Reading time: minute(s)
 Deutsch
 English
 Français
Route Details
This chapter explains what information is displayed for your route. For the output of detailed route information as PDF, see Route details output as a report.
Further information can be found in the sections below:
 General information
|
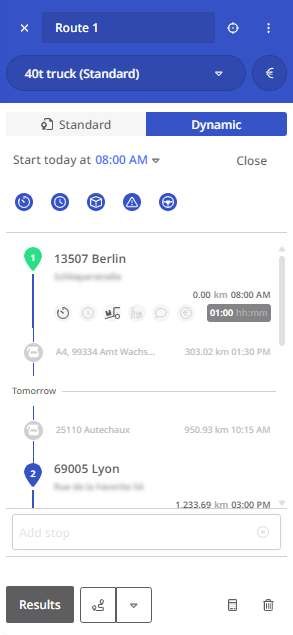
Once you have calculated a route with multiple stops, the route and its stops are listed in the left-hand panel. The display varies depending on the calculation mode:
|
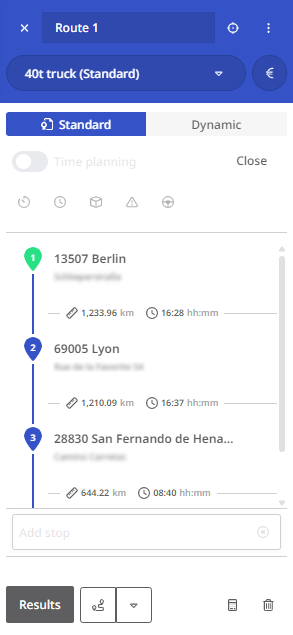
|
|
|
More details about the stop list can be found under “Information in the stop list“.
If events occur along the planned route that could affect your planning, these are displayed in the "Route information" panel. You can also open the panel at any time using the <Route information>  /
/ button.
(See also the section “Current information about your route“ below.)
The center of the screen shows the route on the map.
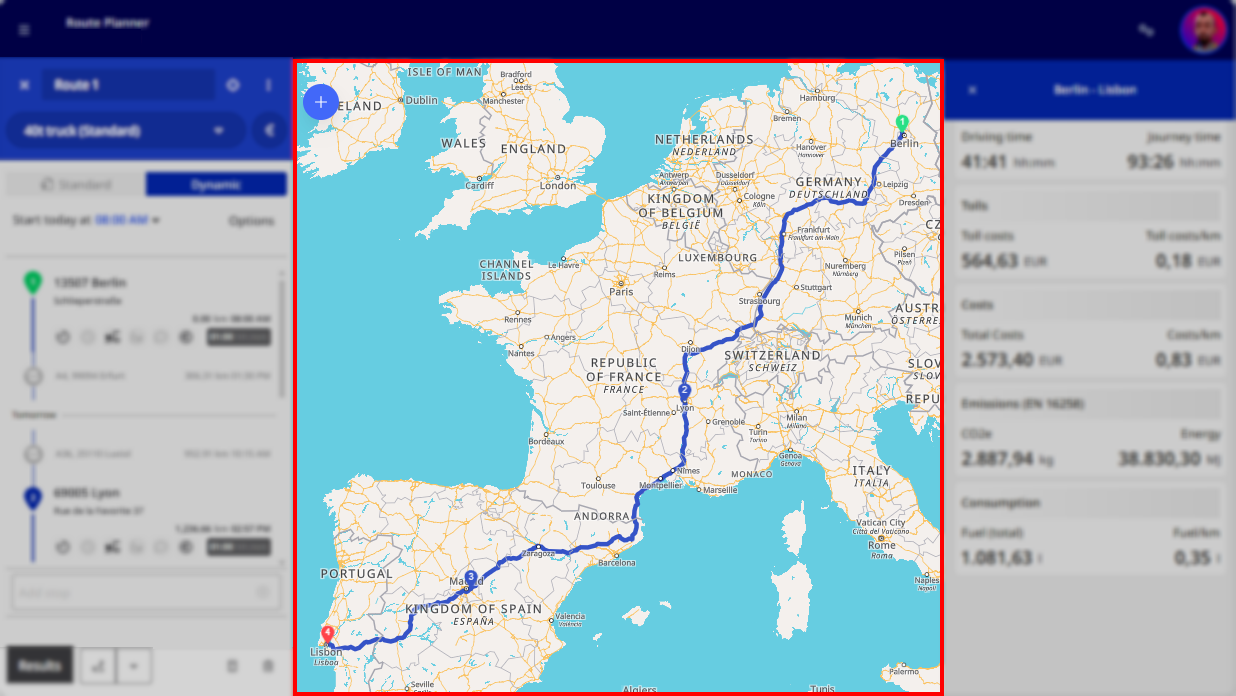
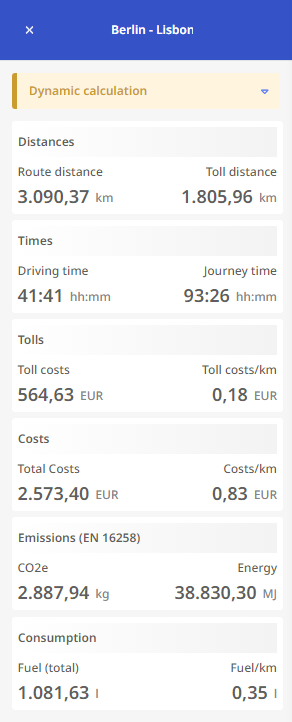
In the right-hand panel, under the “Overview” tab, you’ll find details on distances, driving and travel time, tolls, costs, emissions, and fuel consumption.
|
The displayed values depend on whether your route was calculated in Standard or Dynamic mode. Some values are also calculated based on your vehicle profile settings. For example, toll costs may apply to some vehicle profiles but not others. When calculating a route in standardmode, the information for
is determined based on standard values, known road and toll information, and values that may be derived from the vehicle profile (see “Vehicles“ module). This is color-coded in the header of each information section. Cost information is also influenced by time slots, service times, rest times, and driving times.
|
|
|
In Dynamic mode, the following user-defined criteria are also included in the calculation:
In addition, dynamic mode also takes into account the traffic load typical for the planned time of the route. Clicking on any of the information boxes displays detailed information about the values shown. The following sections explain the displayed information in detail. |
|
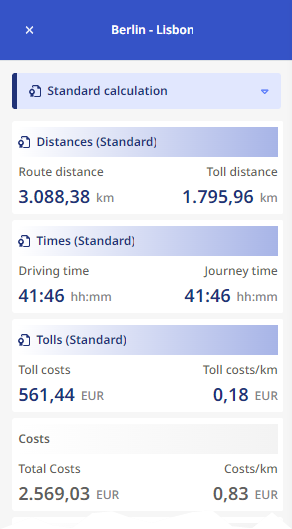
Distances
|
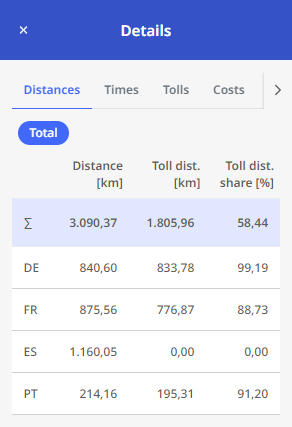
Click the “Distances” information box to view the calculated distances within the route. The following information is displayed:
For cross-border routes, distances and toll distances are also broken down by country. |
|
Times
|
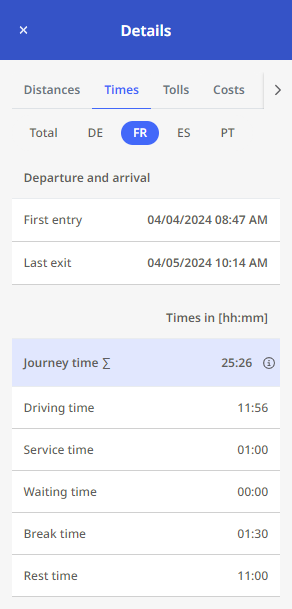
Click the “Times” information box to view the following details:
For cross-border routes, times are also broken down by country.
Click the |
|
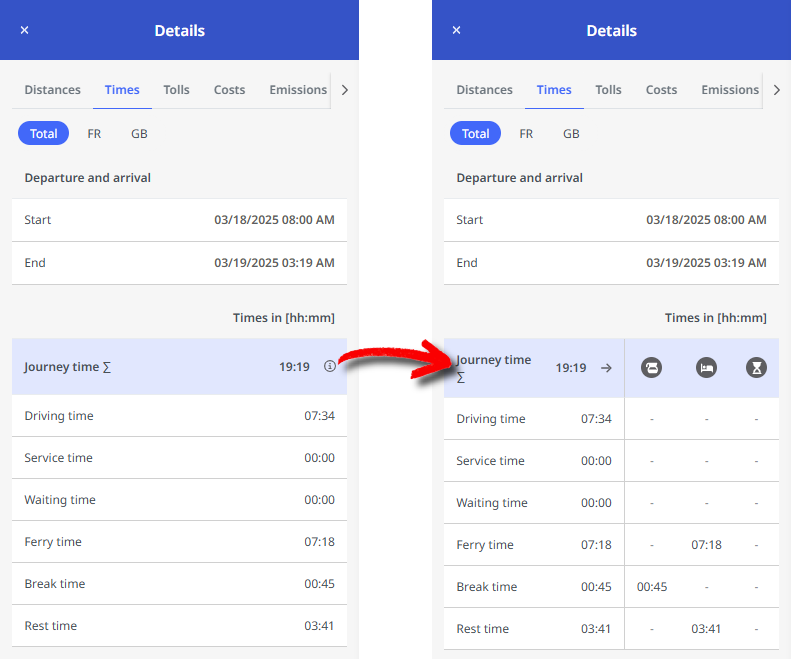
Advanced Information on Waiting, Rest, and Break Times
In the routing settings under “Lenk- und Ruhezeiten“ -> “Stays,” you can activate the following options:
-
“Stay time can be used as break or driving time pause“
-
“Use ferry times as rest and driving time pauses“
If enabled, the detail view shows additional information on rest, break, and waiting times.
|
Click the
occur. Click the Note: If none of the above options are enabled in the routing settings, this extended view is not available, and the
|
|
Toll
|
Click the “Toll” information box to view the toll costs for the route. For cross-border routes, toll costs are also broken down by country. Note: Please note that the toll costs shown here are net costs, i.e., they do not include the value-added tax applicable in the respective country. |
|
Toll scenarios
|
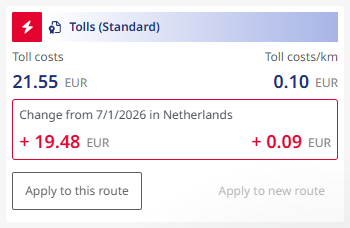
As soon as changes to toll costs are announced by the public authorities, you can include these in your route planning. In such cases, a note about the upcoming change is displayed in the "Toll" section.
Example: In the example shown here, reference is made to a planned toll increase in the Netherlands on 1.7.2026. With <Update route> the start date for the calculated route is set to 1.6.2026. After recalculating the route, the toll costs are then displayed under "Details" with the future toll costs and without a note. With <Create new route>, the same route is created in parallel to the existing route (with the old start date) with 1.7.2026 as the start date, and both routes can be compared directly after the recalculation.
|
|
|
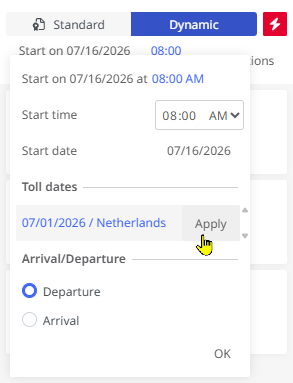
Note: If you calculate your route(s) in dynamic mode, you can set the date so that the future toll costs apply by selecting the departure/arrival time using the "Toll data" -> < Apply> function. This means that the effective date of the new toll costs is taken as the reference date. You can of course also manually set a date after this reference date. |
|
|
If you calculate your route(s) in standard mode, you cannot select an individual departure or arrival date at this point, but you can still activate the calculation according to future tolls. This means that the calculation is still carried out in standard mode, but the start date is fictitiously set to the effective date of the new toll. You can deactivate this setting again using the "Reset" |
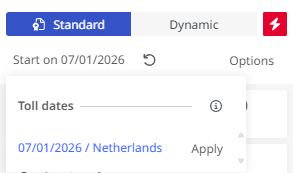
|
 icon.Costs
|
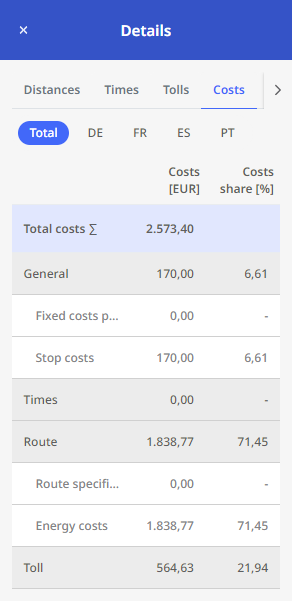
Click the “Costs” information box to view a breakdown of the calculated route costs.
For cross-border routes, costs are also broken down by country. |
|
Costs per country
|
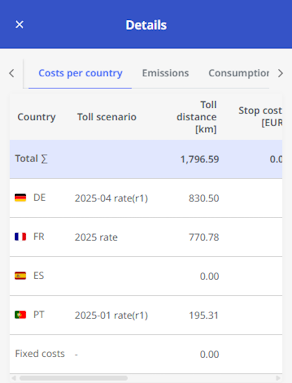
By clicking on the “Costs per country” information box, you will see the calculated costs for the route broken down by country and listed in a table. The table can be scrolled sideways, with the first column containing the country code and flag fixed in place. The table contains the following information:
|
|
Emissions
|
Click the “Emissions” information box to view the calculated emissions for the route. These are based on:
You can also break down the calculated emissions according to the GLEC framework. For this, loading/unloading must be defined for the respective stops. Note: GLEC calculation results can also be downloaded as a PDF report. See “Export route results“ for details.
|
|

Consumption
|
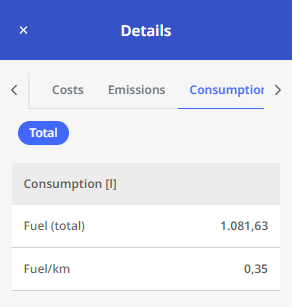
Click the “Consumption” information box to view the calculated consumption values for the route. These depend on:
|
|
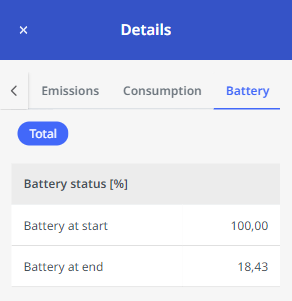
Battery
|
If the selected vehicle is electric, the “Details” section also shows battery charge information. The route starts with an assumed 100% charge, and the charge level at the end of the route is calculated. The charge level is also visualized on the map with a color gradient from green (100%) to red (0%).
|
|
 Current information about your route
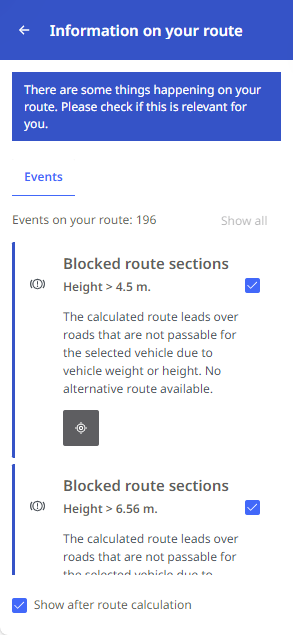
If events occur along the planned route that could affect your planning, these are displayed in the "Route information" panel. You can also open the panel at any time using the <Route information> / button.
|
The panel displays various events that affect your route, for example:
A distinction is made between two types of messages:
You can jump directly to the location of the event on the map using the crosshair symbol next to each event. You can specify for each event that it is no longer displayed when the route is recalculated. To do this, deactivate the checkbox to the right of the respective entry. You can use the "Show after route calculation" checkbox to specify whether the information panel is to be opened
|
|
For the output of detailed route information as PDF, see ”Route details output as a report”.