Reading time: minute(s)
 Deutsch
 English
 Français
Create a vehicle profile
This chapter describes the creation of a vehicle profile with its settings.
|
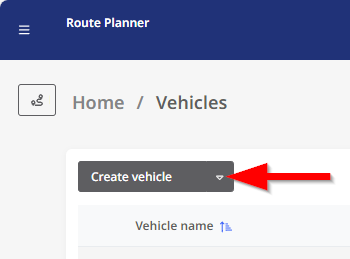
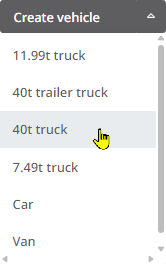
To create a new vehicle profile, click on the drop-down icon of the <New Vehicle> button in the “Vehicles” module. A list of standard vehicle profiles then opens that you can use as a template for your new profile.
If you click the <New Vehicle> button instead, a new profile is created based on a 40T truck. |
|
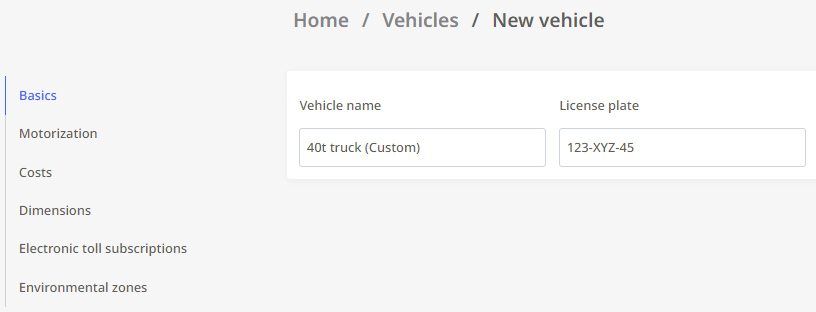
The page for a new vehicle profile is now displayed. Here you can now make the different settings for the profile. If you have selected a profile as a template, some of the settings are already filled with the values of the template.
Further information can be found in the sections below:
 General
|
In the “General” area you assign
|
|
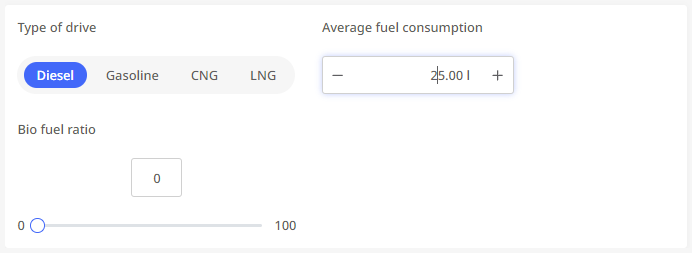
Motorization
In the “Motorization” area you determine the following:
|

|
|
|
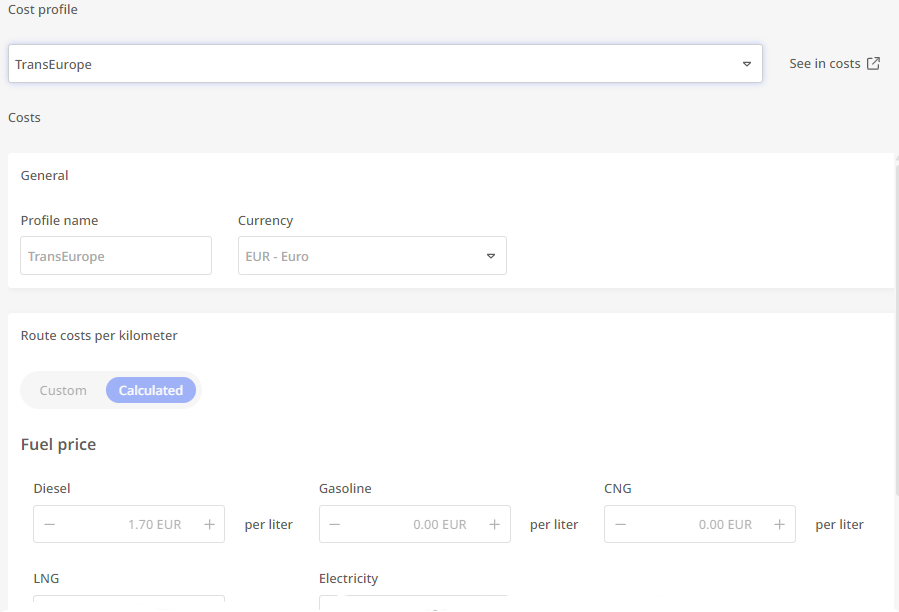
Costs
|
In the “Costs” area, you can connect the vehicle profile to an existing cost profile (see “Costs"). |

|
|
As soon as you have selected a cost profile, the values of this profile will be displayed. You cannot change the settings for the cost profile at this point - if this is necessary, you can go to the module for cost planning via the |
|
Note: By saving the vehicle profile, the cost profile selected here is assigned to the vehicle profile by default. It is therefore used by default when this vehicle profile is selected during route planning.
As part of a route planning, you can also choose a different cost profile as an individual case - via the € symbol in the header area of the stop list.
![]()
However, the cost profile assigned to the vehicle profile via the vehicle administration remains assigned as a standard.
For the cost profile selected in route planning, a tooltip shows the route costs per kilometer, the route costs per hour and the fixed route costs per trip.
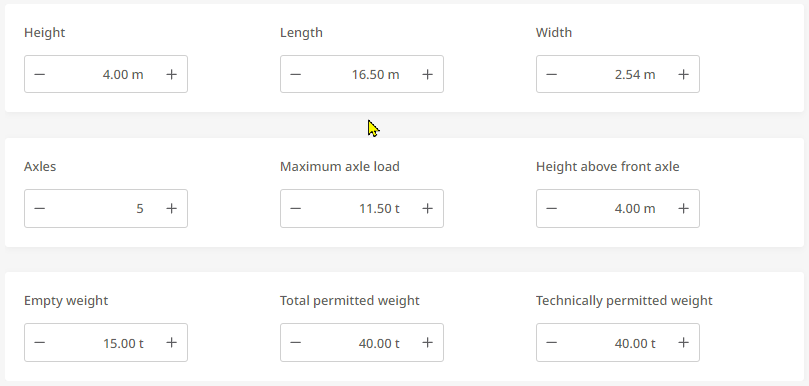
Dimensions
|
In the “Dimensions” area, you can enter the height, length, width and weight. This information is relevant for the evaluation of road and passage restrictions when calculating the route. The “Technically permitted weight” property can also be used for the calculation of toll costs (e.g. in Austria). |
|
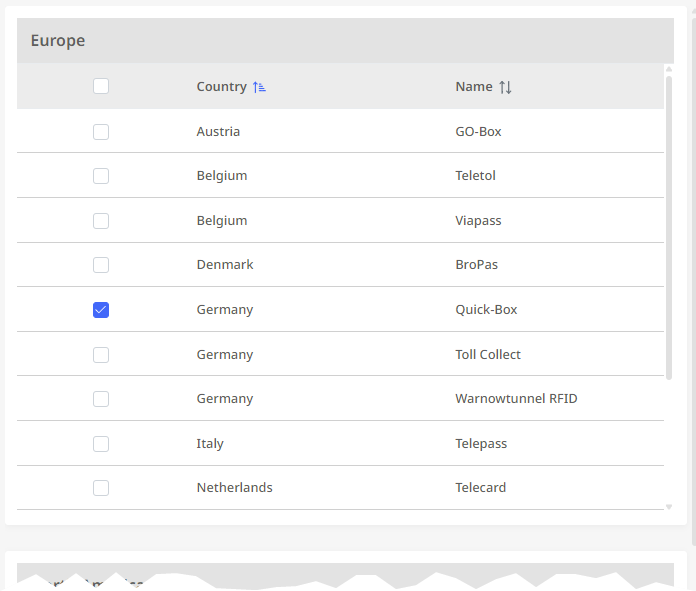
Electronic toll subscriptions
|
In the “Electronic toll subscriptions” section, you can specify the toll devices your vehicle is equipped with.This setting can affect the toll calculation for the route, as some subscription tolls differ in price from one-off payments. . |
|
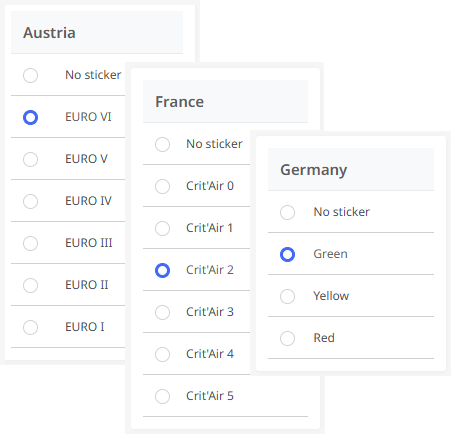
Environmental zones
|
In the “Environmental zones” section, you can specify which environmental badge(s) your vehicle is equipped with. This setting can affect route planning, since urban environmental zones may have to be bypassed. |
|
As soon as you have made all the desired settings, confirm it by clicking on the <Save and close> button in the upper left window area.
The creation of the vehicle profile is thus successfully completed.