Reading time: minute(s)
 Deutsch
 English
 Français
Edit the stops
If you want to calculate your route dynamically, you can define individual settings for each stop – such as service time, time window, load, or cost. You can also define costs for each stop independently of the “Dynamic” calculation mode, even in standard mode.
Further information can be found in the sections below:
 General proceeding
|
|
*Note: Traffic information vs. typical traffic conditions
Activating the “![]() Traffic information” function includes current traffic events (e.g., accidents, traffic jams, road closures) in the calculation for the route.
Traffic information” function includes current traffic events (e.g., accidents, traffic jams, road closures) in the calculation for the route.
Regardless of this, the dynamic calculation mode always takes into account the typical traffic situation for the planned time of the route. For example, a route that passes through a certain area during known rush hours usually takes longer than the same route that passes through this area at a different time.
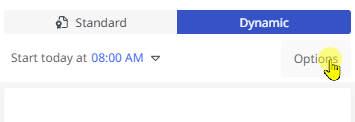
Note: These options can also be accessed via the corresponding button, which takes you to the Routing Settings section. An overview of the routing settings can be found here.
|
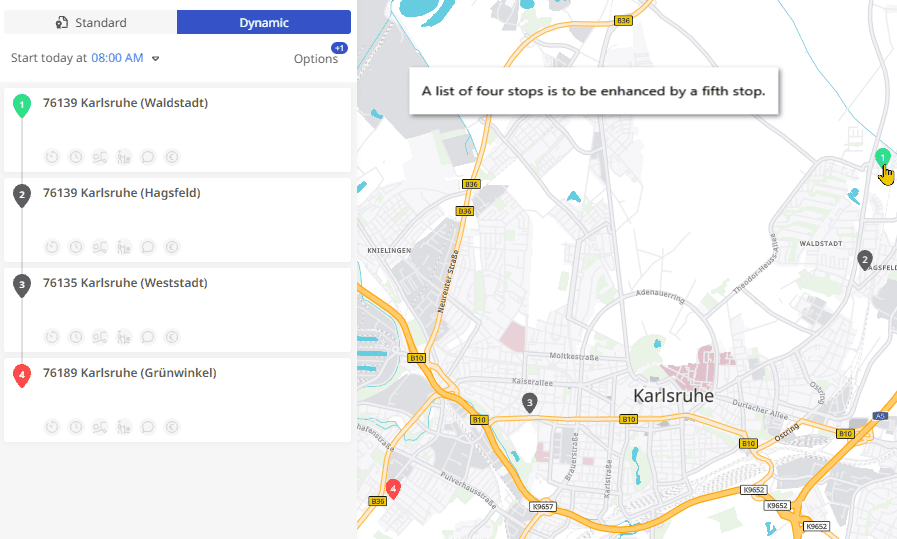
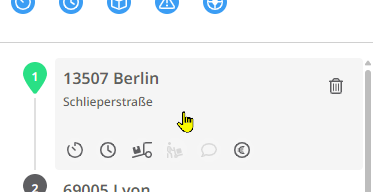
You can now define settings for each stop individually.
|
|
|
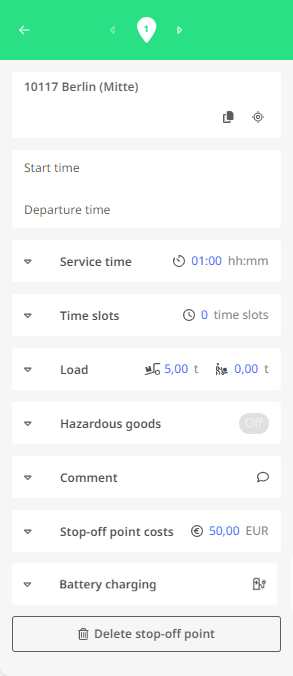
A side panel opens for editing the stop. The following options are available:
Start and end times are only shown if the route has already been calculated. If no service time or time slot is defined, the start time equals the end time.
|
|
To change individual settings, follow the instructions below.
Note: Please also refer to the section on Stopps with ferry connections at the end of the chapter.
Edit the Service Time of a Stop
|
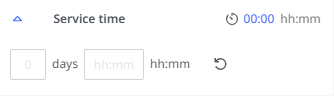
|
Edit the Time Slot for a Stop
|
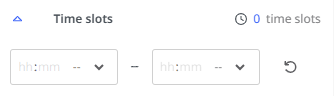
|
Edit the Load for a Stop
|

|
Warning: Ensure that the unloading at a stop does not exceed the total loading from previous stops. For example, if you unload 8.5 tons at stop 4 but only loaded 8 tons before, the vehicle load would be negative. In this case, the route cannotbe calculated. An error message will appear when you click <Results>.
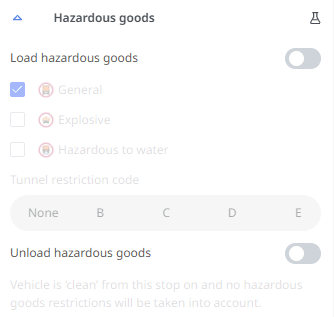
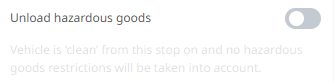
Configure Hazardous Goods Settings
You can also set the tunnel code (according to ADR) for the hazardous goods. |
|
|
|
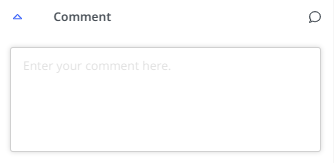
 Add a Comment to the Stop
|
|
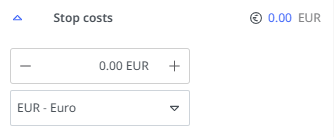
Edit Costs for a Stop
|
|
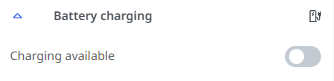
Set Battery Charging Option
|
|
Stopps with ferry connections
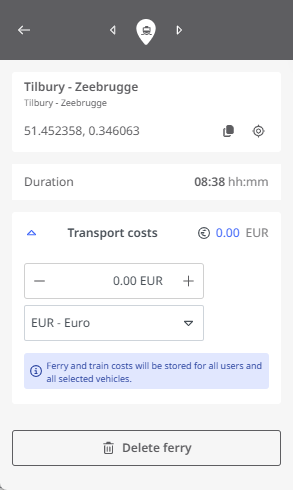
If one of the stops in the list is a ferry connection, the detailed view will look slightly different.
|
In the detailed view of the stop, the ferry duration is displayed for the ferry in addition to the address and coordinates of the starting point. You can also enter the cost of the ferry connection here so that it is included in the cost calculation for the route. Apart from deleting the stop, no other editing of this stop is possible. |
|